Screened-Porch Cable-Rail Installation
Step-by-step instructions on installing this system from Feeney for a modern aesthetic.
Sponsored by Feeney
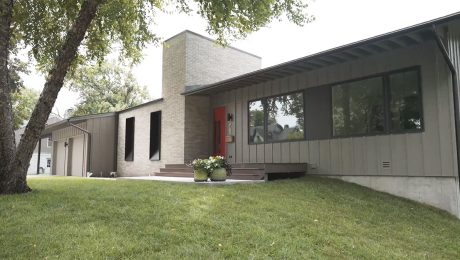
We’re moving forward with the final touches on our screened-porch installation here in Prairie Village, Kansas, and we’ve selected the Feeney Cable Railing System to finish out the aesthetic of this space. Chris at Forward Design and Architecture worked with the client and with us to ensure consistency with all of these horizontal moments that have been tracking along this exterior elevation, and Feeney’s design options were able to complement that effort. Here’s the process we followed.
Plan your system
The first step in any successful project is to begin with a great plan. With the Feeney system, that starts on the company’s website, where you select the cable-rail option that fits your project. Then you measure the total distance of the railing. Multiply that by the number of courses and you get the total length of cable you will need.
Now you want to count fittings. Once you’ve done that, you plan for the top rail. In most applications, 36 in. will not require an intermediary support, but for longer lengths, the company recommends providing that vertical support. With that in mind, plan the installation. Get your materials list together, allow for the lengths that you’re going to need, and have ready the installation and removal tools that will make the process go well.
Begin the installation
Once materials arrive on-site, you’re ready to begin your installation. Start with a good level so that you can set plumb, and locate that plumb line at the correct dimension out from the exterior. We have a 6×6 structure inside, but the outside corners are almost 10×10. So even though this looks offset, it’s very intentionally centered on that exterior plane. Once you’ve established where that location is, you can even place your level on the picket provided by Feeney to make sure that you are again plumb. Then drill holes for all of your lags at the 3-in. centers already established on the picket.
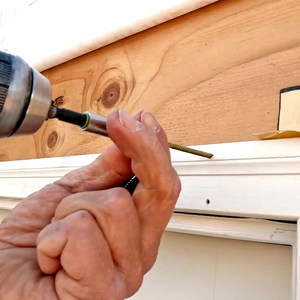
After drilling those holes, you’re ready to begin the installation. Feeney’s provided installation tool, which simply threads on to the fine side, chucks into your drill and allows you to drive the coarse threads into the structure. Once you’ve got that done, you’re able to install the quick-connect lag tensioner, again on that fine thread.
Time for cable
Now you’re ready to install the cable. Simply push it into the fitting and pull it taut across to the other side. A mark on the other fitting shows where to make the cut on the length of cable. Be sure to remember if you have an intermediate picket that you thread through so that you don’t have to undo the work you just completed.
With all of the cable installed in the fittings, now you can move on to the top rail, making sure that any midspan support pickets are secured. With the pickets in place and secured, install your end brackets, cut your top rail to length, and complete that installation.
With the top rail secure, move on to the final tensioning of each of the cables. This is just done to feel with the rotation of the quick-connect lag tensioner, so that each cable feels the same tension and is visually very sharp and parallel. If for any reason during the installation process you find that you’ve got a cable in a fitting that you need to release—maybe to go through an intermediate support picket or if the cable is damaged in some way and you need to replace it—use the quick-release fitting, which simply slides onto the cable, presses into the fitting, and releases the bushing to pull that cable out of the fitting. Then you can reset it as needed.
And that completes our Feeney Cable Rail installation, which provides safety for our clients but also makes for a stunning aesthetic for this project.
RELATED STORIES

